You're here because you're looking for the absolute best UV light for curing resin (that is, UV resin—brush up on the differences between UV resin and epoxy resin here).
You've probably seen hundreds of different products on Google or Amazon, but you're wondering, which one is the best?
In this article, we've drilled down all the options into 4 main types you should know, plus one product recommendation for each category.
Now let's take a look!
Note: This post contains affiliate links, which means that we may receive a commission if you make a purchase using third-party links.
Best UV Light for Curing Resin: 4 Types to Consider
- UV Flashlights - A Great Choice for Any Project
- Foldable UV Lamps - Quick Set-it-And-Forget-It Curing
- Double-Sided UV Lamps - Cure Both Sides at Once
- Square UV Lights - Great for Larger Items
#1 - UV Flashlights
A Great Choice for Any Project

We love UV resin flashlights because they're easy to hold and shine light into every nook and cranny of your UV resin project. Uniquely shaped molds, larger items like tumblers, and even UV resin in motion? Cure it in a snap with this guy.
The truth is, we love them so much that we created our own MakerFlo LED UV Flashlight, which we're excited to share with you here. It operates at 395-400nm, which is perfect for our MakerFlo UV Resin. We've also bundled it into the UV Resin Starter Kit.
Here's why we prefer UV flashlights in most cases:
- They're light and easy to hold
- You can take them anywhere, including craft shows and events (they're great for live demos and Make & Takes, which is one of our techniques for selling more at craft shows)
- These bad boys can cure tumblers and large items as well as small ones—any size is ok!
- They make it easy to cure any part of the resin
That said, there are a couple of downsides to consider:
- UV flashlights run on batteries, so you'll want to have extras on hand
- And these are more "hands-on" (literally), so you can't do "set it and forget it" curing
All told, this is our favorite type of UV light for the everyday crafter because it's flexible for any kind of project you may attempt. On top of that, you don't need a power source and you can take it on the go!
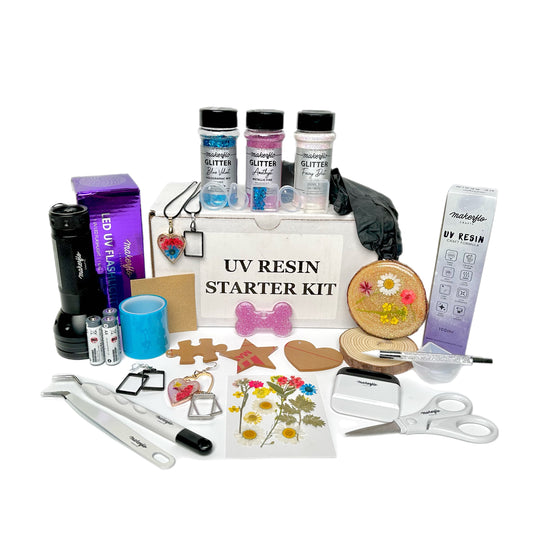
By the way: If you're just getting started with UV resin and haven't gathered all your gear yet, let us introduce you to our handy-dandy UV Resin Starter Kit!
This kit comes packed with our craft-ready UV resin, plenty of molds, all the basic tools you need, and some extra supplies to get you started. Of course, we've included our UV resin flashlight, too.
If you're ready to crush the UV resin game, grab the starter kit here 👇
#2 - Foldable UV Lamps
Quick Set-It-And-Forget-It Curing

This foldable UV resin lamp is a huge favorite of ours!
To use this, you simply plug it in, set up the legs, place your resin molds underneath, and turn on the light! Our comes with a 60 and 120-second timer so you can cure with precision.
Here's what we like about this type of UV light:
- You can "set it and forget it" and do something else at the same time
- It has several high-powered bulbs, which cure resin more quickly
And here are some extra features we've added to make it even easier to use:
- We've made it 9 x 5 x 2.5 inches to fit slightly bigger items than most similar lamps
- Ours works wirelessly, so no more worrying about cords in your way
- When you do plug it in, the included 6.5-foot-long cord will reach any plug nearby
- Includes 23 LED bulbs at 36 watts for quick curing
- Comes with a complimentary silicone working mat, too!
Get a closer look at our UV resin lamp below! 👇
#3 - Double-Sided UV Lamps
Cure Both Sides at Once

In addition to the tabletop light, you can find double-sided lights like these.
This gadget shines UV light from both the top and bottom plates. That means you can cure both sides of your resin at the same time. There's a thin, clear plate in the middle that you set your item on to make this work.
As a bonus, you can split these in half to create two separate lights if you need.
Here's what we like about double-sided UV lights:
- This version cures both sides at once, which can save you time
- You can "set it and forget it"
- And it's nice that you can pull these apart to make two smaller lights, too
That said, here are the downsides:
- It only works on small items that fit inside the top half, which limits what you can cure
- Resin could drip down and ruin your lights
Want to try this double-sided UV light for yourself? You can get it on Amazon here.
#4 - Square UV Lights
Great for Larger Items

Our fourth and final type of UV light is the square-shaped standalone light. We've seen crafters rave about this type of light because it has a strong beam and can be placed next to a turntable to cure larger items. (Just like the picture above.)
So here's what we like about this type of UV light:
- It works with small and large items
- You get a constant power source because it plugs into the wall
- And you can set it next to a turntable to cure larger items
But here's what we don't like:
- It's heavier to hold or you'll need to build or buy a stand for it (even with a turntable, you'll need to hold it to cure a larger item)
Want to try this light for yourself? You can get it on Amazon here.
What to Know When Choosing a UV Light for Resin Projects
Not every UV light will work for curing resin.
Make sure you're picking one that has the right KIND of UV light. That's one that emits light at 365 to 405nm with a wattage of 36 watts or higher.
BUT - the best kind of light for YOUR UV resin is the one your brand recommends. Check the instructions that came with your UV resin to be sure.
How to Get the Best Results When Curing UV Resin
Here are our 7 best tips for curing resin, so you can get the best results.
- Cure both sides! Just because you applied light to the top doesn't mean it's cured on the bottom. Cure the top and flip it over, or rotate the object so light hits all sides equally.
- Beware of too-opaque resin. Don't use too much dye, especially black or dark colors. If the light can't get through, it can't cure the resin.
- Apply your resin in thin layers. Cure one layer at a time, which speeds up the process and ensures everything cures fully.
- Be aware of humidity. Higher humidity can slow down the curing process.
- Pay attention to room temperature. If it's too cold or too hot in the room, you may not be able to cure resin properly.
- Avoid bubbles. Bubbles can be caused by mixing too much! If you do get bubbles, take time to remove them before curing. (See our guide on how to use UV resin to learn more.)
- Test the surface. Even if you think your resin is cured, lightly touch the surface to make sure it's no longer tacky.
Safety Precautions When Using UV Lamps & Lights
Make sure to use eye protection that blocks UV light. 😎
UV light harms not only your eyes but also your skin, so try not to shine the light on yourself either.
Final Thoughts
Our favorites are the UV flashlight and UV resin lamp, of course!
Remember, if you're still getting started and want to gather all the supplies you need for UV resin crafting in one bundle, check out our UV Resin Starter Kit!
And don't forget to join us in our Official MakerFlo Facebook Group to connect with thousands of other crafters on the journey with you! We'll see you inside.
Before you go, check out these other resources you might like:
- How to Use UV Resin: Beginner's Guide for Crafters
- 16 Awesome UV Resin Ideas to WOW Your Customers
- UV Resin vs Epoxy Resin: Which Is Better For Your Next Project?
- How to Customize a Tumbler in 12 Creative Ways
Frequently Asked Questions
How long does it take to cure UV resin under UV light?
It should take a minute or less for thin layers, but it might take longer in some situations. Overall, it shouldn't take longer than 5 minutes to cure.
How can you cure UV resin faster?
Apply UV resin in thin layers and cure each one as you go. Make sure to use a good-quality UV light with a wavelength of 365 to 405nm.
What wattage is best for curing resin?
Check your brand of UV resin to see what they recommend. You usually want at least 36 watts. If it's too high, like 150 or more, it may cure the resin too fast and cause warping.
What's the difference between 365nm, 395nm, and 405nm for resin?
All of these wavelengths can cure UV resin, but it's best to check your brand of resin to see what the manufacturer recommends.
Will a black light cure resin? And if so, does it take longer to cure?
Probably not. Black lights don't emit the same type of UV light as UV resin lamps. Even if it does work, it will take a long time. That's why it's best to invest in a UV light for that specific purpose.
Can I use sunlight to cure UV resin?
You can! But sunlight is difficult to control, so if you're running a business and need to build a reliable production line, we recommend having a proper UV light.
Can you overcure UV resin?
Yes. Once the UV resin is no longer tacky and feels "dry" to the touch, it should be done. If you keep curing past that point, the resin can get brittle. Read your UV resin's instructions to see how much time they recommend for curing.
How do I know when UV resin is fully cured?
When UV resin is fully cured, it no longer feels tacky. It should feel "dry" to the touch. It may not be perfectly smooth, but you can sand it if you want a smoother surface. If it feels tacky, it needs to be cured more.
If you keep curing your resin and it never gets dry, you might have added too much dye (and the light is unable to penetrate into the resin), or you might be in a difficult environment for curing (aka too wet, cold, or hot). The more you practice, the more you'll get the hang of it!
Can I use a nail light to cure UV resin?
Check the wattage and wavelength to make sure, but yes, you can usually use a UV nail light to cure UV resin. You'll have to stick with items that fit under the lamp.


