Skip to content

You want to create beautiful sublimation prints like you see online, but you’re not sure how to begin.
You’ve seen other crafters turn out seamless tumblers, colorful t-shirts, and handmade keepsakes, but when you try to figure it out for yourself, it feels overwhelming.
Don't sweat it! We've been there, too. And we're here to help. 💁♂️
In this ultimate guide to sublimation for beginners, we’re going to strip away all the confusion so you can find clear answers and a step-by-step guide to getting started right away.
Plus, if you still have questions after this guide, we’ll show you where you can get all your questions answered by experts for absolutely FREE.
Ready to get started? Here we go! 🎨
What's Inside This Guide
- Sublimation for Beginners - What You Need First
- How to Print Sublimation Images
- How to Apply Sublimation Transfers
- What is Sublimation Printing?
- Sublimation Troubleshooting Guide
- Conclusion
- Frequently Asked Questions (FAQs)
Sublimation for Beginners - What You Need First
So what do you need to get started as an absolute sublimation beginner? Here's the full list, with more information as you scroll down:
- Sublimation images
- Sublimation blanks
- Sublimation printer
- Sublimation ink
- Sublimation paper
- Sublimation oven or heat press
- Other supplies
Sublimation Images

You'll first need to prepare some sublimation images for printing.
You can get them in two ways: by creating them yourself using your favorite design program, or by purchasing them on a marketplace like Creative Fabrica.
Once you've got your sublimation images, you'll also need some sublimation blanks.
Sublimation Blanks
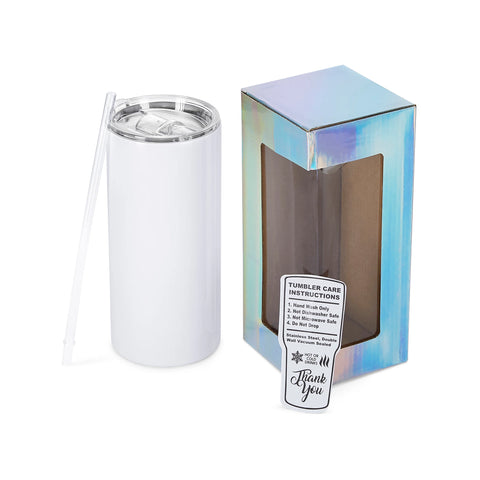
Sublimation blanks are objects designed for sublimation transfers. They're usually white and have a polyester coating that's perfect for soaking up sublimation ink.
You can find sublimation tumblers, mugs, pens, and more. And if you're looking to customize t-shirts, hats, or other fabric items, you'll want to find fabric made of at least 65% polyester for best results.
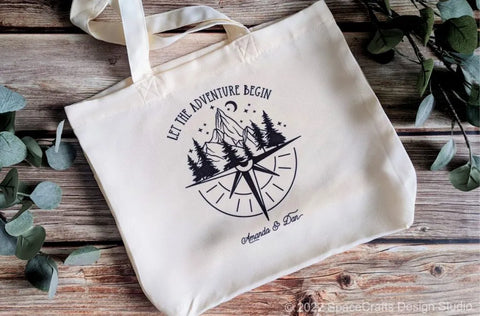
(Here's an awesome sublimated tote bag from Space Crafts Design Studio.)
Check out our mega list of sublimation ideas for more ideas on what you can create.
Printing Equipment & Supplies
To customize your sublimation blanks, you'll need to gather the necessary equipment. Here's what you need:
Sublimation Printer

You'll need a sublimation printer that prints with sublimation ink on sublimation paper. A commercially-produced sublimation printer will come with all the software you need—just connect it to your computer, and you're ready to go!
You can either purchase a specialized sublimation printer (we recommend the Epson SureColor F170 for beginners) or convert an inkjet printer like the Epson EcoTank Printer yourself.
Learn more in our ultimate guide to sublimation printers.
Sublimation Ink
Sublimation only works with special sublimation inks or sublimation dyes. These dyes sink into sublimation paper and are activated with heat.
When you apply heat to the transfer, the dye turns into a vapor which goes deep into the polyester surface of your object, transfering the design from within. More on that in the next section.
Sublimation Paper
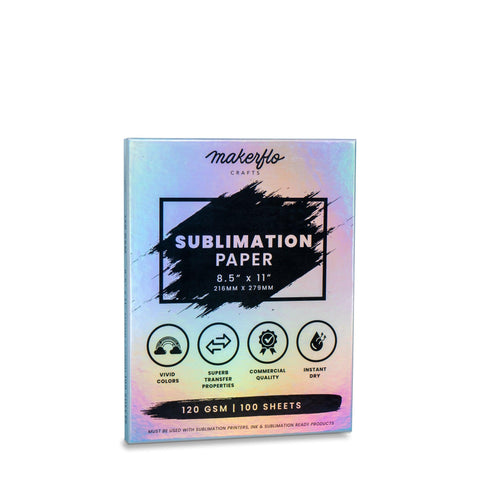
The final item you'll need is sublimation paper. These can come in sheets or rolls, depending on your printer model.
But for beginner printers, a set of sublimation paper sheets works best for most printer types.
Sublimation Oven or Heat Press
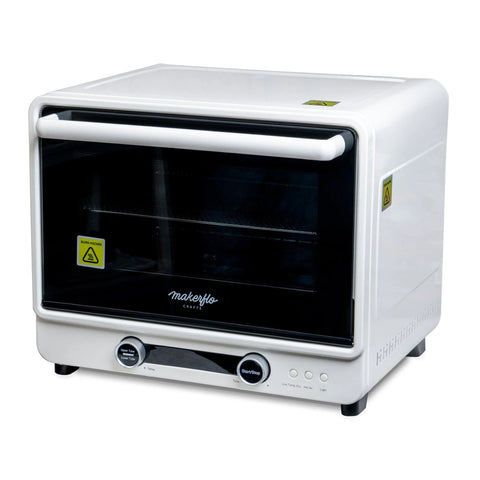
Next, you'll want something to transfer your items with. Since sublimation dyes are activated by heat, you'll need either a sublimation oven or heat press to transfer the design.
Sublimation ovens are great for round objects like tumblers, mugs, and mechanical pencils. They're also easy for beginners.
A heat press is needed for flat items like t-shirts and tote bags. You can also purchase specially-shaped heat presses, like a mug press or tumbler press.
Other Supplies
These things are small but very important. Don't forget to keep your room ventilated by using an air purifier or opening windows and doors.
You'll also want heat-resistant tape to tape down your designs for transferring and heat-resistant gloves to handle hot items.
You might want a lint roller to clean fabrics before pressing, butcher paper to stop ink from dyeing your heat press, cardstock to stop ink bleeding when pressing a t-shirt, and plastic gloves to keep fingerprints off your item.
How to Print Sublimation Images
Printing sublimation items is super easy. Here's what to do:
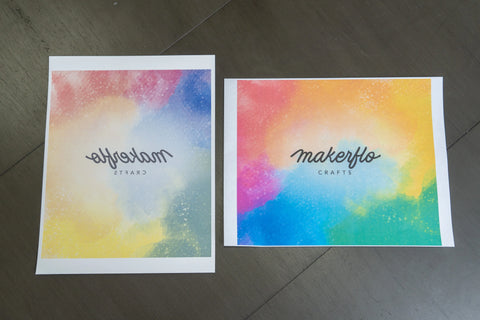
First, prepare your design. You might choose to buy a design from a marketplace like Creative Fabrica or create your own.
Make sure the design is the right size to fit onto your object with no gaps.
Next, send the design to the printer. Sublimation printer software should automatically print your design in reverse, but if you’re using a DIY converted printer, adjust the print settings so the image is mirrored when you print.
Once the image comes out of the printer, it's ready to transfer anytime!
How to Apply Sublimation Transfers
So you're ready to apply your sublimation transfer. Here's what to do step-by-step.
- Prepare your sublimation blank. You'll want an object that has a sublimation coating or is made out of polyester or a polyester blend. MakerFlo sublimation blanks are perfect for this.
-
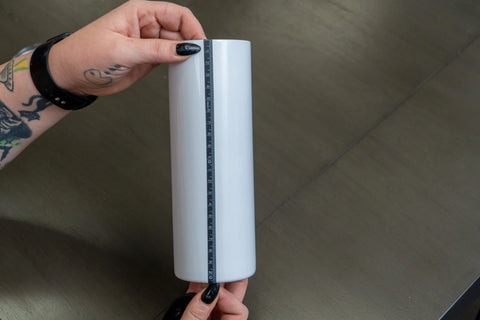
Tape your design using heat-resistant tape. For most types of transfers, you'll want to tape down the design. If you can use a flat heat press, you may not need tape. The key is to make sure the design is touching the object exactly where you want the design to show up.
![Cutting down the sublimation print]()
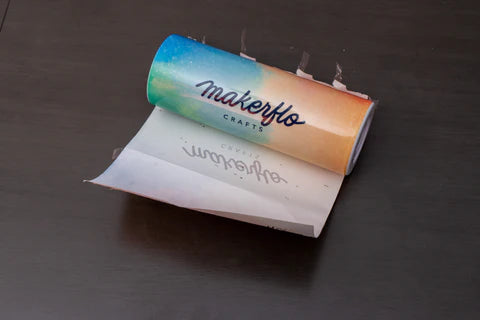
When sublimating a tumbler using a convection oven, you'll want to tape the design down very tightly so that no gaps remain. (Just make sure that you apply tape only to the transfer paper, not to the cup itself.)![Taping down the sublimation transfer paper]()
-
Apply heat. There are two ways to do this: the sublimation oven method, and the heat press method.
![Putting a sublimation tumbler into the oven]()
- Sublimation oven: Tape your design down tightly onto the object so there are no gaps. Then bake in a sublimation oven for the recommended time at the recommended temperature for your object of choice, turning the object over halfway through baking.
- Heat press: Using a heat press in the right shape for your object, you'll press using medium pressure for the recommended time and temperature for your sublimation blank. Some presses require you to press twice, once for each side of the design.
- Remove the transfer paper. Depending on your brand of transfer paper and sublimation object, you might peel the transfer when it's still hot, or wait until it cools. Check your specific brand for instructions.


What is Sublimation Printing?
Sublimation printing, also known as dye-sublimation printing, is a printing method that uses special ink that turns into a vapor at high temperatures.
When you apply heat to sublimation transfers, the dye sublimates, aka vaporizes, and tiny particles of ink seep into the fabric and embed themselves on a deeper layer.
What's left is a beautiful, high-fidelity design that's not lying on top of the object, but permanently embedded into the material.
How does sublimation printing work?
Sublimation is the name for a chemical process in which a solid skips the liquid stage and transforms into a gas.
That's exactly what happens with sublimation transfers. The dried ink vaporizes, which allows it to dye your materials with a finer touch and a more detailed finish, and also go deeper than just the surface level of the material.
So why choose sublimation over other methods?
Advantages of Sublimation Printing
Here's what's great about sublimation:
- Ink goes into the material (unlike transfers that sit on the surface) so it never cracks or peels like an adhesive transfer
- Because the ink vaporizes, you can create beautiful blended edges and watercolor effects with vibrant colors that you can't really get with other types of printing
- You can sell transfers or save them for later, which makes the process more efficient
- Sublimation is easy to start for beginners, doesn't require much maintenance, doesn't have any pretreatment or other steps, and has a low cost of entry—it's great for beginners, hobbyists, and business owners alike
That's not to say there aren't any downsides. Here's what you should know before getting into sublimation printing:
Downsides of Sublimation Printing
- Sublimation doesn't use white ink, so it won't show up on dark-colored fabrics. Keep that in mind when choosing designs and materials to customize.
- Sublimation transfers only really work with polyester materials or fabrics with a high polyester count (at least 65%), though you can use cotton or other natural materials if you apply a sublimation coating first.
Alternatives to Sublimation Printing
Wondering what other printing methods are out there? Here's how they stack up:
DTF Printing
DTF or direct-to-film printing is a printing method that uses special inks, transfer paper, and powder adhesive to create transfers. When you apply heat, the transfer adheres to any object you place it on.
Pros: You can use white ink and transfer onto practically any material
Cons: There's a lot of maintenance involved. DTF isn't for hobbyists
DTG Printing
DTG or direct-to-garment printing is a method in which you print inks directly onto the garment using a DTG printer. There's no need to transfer with heat because the ink is applied to the fabric directly.
Pros: No need to transfer any design
Cons: Don't get the blending of sublimation, expensive, and slower to create since you must pretreat each garment and print it separately
Screen Printing
Screen printing is a method in which paints are applied using a squeegee over stencils to create the desired effect.
Pros: You can use a variety of materials and effects, like textures, glitter, and more
Cons: You need to create stencils for each new design you create, which takes time and effort
Heat Transfer Vinyl
Heat transfer vinyl is a vinyl sheet that can be applied to shirts using heat. You buy the color and finish of vinyl you want to use, then use a machine like a Cricut to cut out your design and apply it to the shirt.
Pros: No need to worry about printing
Cons: You can't create detailed custom designs, just cut-outs in the shape you want to transfer. And you'll need to "weed" the design, in other words, carefully remove the excess vinyl around your cut-out
White Toner Printing
White toner printing is similar to DTF, where you print out transfers using color and white ink on transfer paper.
Pros: Can use white ink and transfer to all types of materials, including glass, wood, and ceramics
Cons: Expensive, and you need to "marry" two sheets, the printed design and the adhesive sheet, to make it work
How hard is it to succeed with sublimation printing?
Sublimation is one of the easiest methods to start out with, plus the materials are more low-cost than other methods like DTF, DTG, or screen printing.
If you're worried about whether or not you can successfully sublimate your own designs, don't! We've seen hundreds and hundreds of crafters create beautiful designs, and you can do it, too!
How much does sublimation printing cost?
While a DTF printer will set you back $3,000 or more (without inks and any materials), you can get started with a sublimation printer for just $450, inks and paper included.
The entire set of items you need can be purchased for just $950 if you pick up our Epson F170 Sublimation Ultimate Starter Kit, including a sublimation oven, extra sublimation paper, inks, and a collection of our favorite sublimation blanks to get you started.
Now, once you start out sublimation you might run into a couple of common issues. We get questions about these all the time, so we put together this little guide to help you get un-stuck.
Save this article for later so you can have it when you need it!
Troubleshooting Guide: What to Do If...
It's normal to run into problems when sublimating for the first time. Here are some common problems you might face and how to fix them.
Why isn't my design transferring properly?
A few reasons why this can happen: You might not have taped your design tightly enough on your object to remove any gaps. This is especially important for sublimating tumblers, cups, and other round items.
Next, you'll want to check your baking temperature or heat press temperature, and if it matches what your sublimation blank maker suggests.
Finally, if you're doing all this and still seeing spots on your design, your object might have moisture on it while transferring. To fix this, you can apply heat and pre-bake or pre-press to remove the moisture before taping down the design.
Why is my sublimation paper sticking to my tumbler or cup?
If you heat your tumbler or cup for too long, the paint on the cup can soften and stick to the transfer paper. Stick to the guidelines from your manufacturer and wait until the transfer paper cools before removing for best results.
The paint on my tumbler or cup is chipping off when I press it in my heat press. Why is this happening?
Make sure you're using the right-sized cup for your heat press. And also double-check your temperature settings. For MakerFlo tumblers, we recommend heating at 360°F for 40 seconds, and repeating every time you rotate the cup.
Finally, If you apply too much pressure, that can also make the paint chip.
Why am I seeing small dots on my design?
These small dots are probably caused by moisture on your material. To fix this, you can pre-press or pre-bake your items to dry them out. Let the item cool before transferring your sublimation print as normal.
Why does my sublimation design crack or fade after I wash it?
You don't want to wash your items too quickly after sublimation. Give the sublimation dyes some time to dry before trying to wash. (Also, pay close attention to the care instructions that come with your sublimation blank. It's best to handwash sublimated cups and tumblers and wash t-shirts on the gentle cycle without any harsh chemicals.)
Conclusion
So there you have it! Everything you need to know to get started with sublimation crafting, avoid common mistakes, and bring those wonderful ideas swirling in your head into reality.
Let’s recap your action plan to get started.
-
Grab your materials. We recommend the Epson F170 Sublimation Ultimate Starter Kit, which is jam-packed with everything you need to start with sublimation.
![MakerFlo Sublimation Ultimate Starter Kit]()
- Try out your first couple of designs, following the steps we outlined in the article above. Don’t sweat it if it doesn’t work out perfectly the first time. Practice makes perfect!
- Show off your amazing creations and troubleshoot with our crafting community in our Official Facebook Community - yes, this is where you can get all your sublimation and crafting questions answered for absolutely free - how awesome is that!?

We are so excited to see your very first creation. Promise us that you’ll let us be part of your sublimation journey.
Most of all, believe that YOU can do this! Go get ‘em!
Frequently Asked Questions (FAQs)
What do I need to begin sublimation?
You'll need a sublimation printer, sublimation paper and ink, and a heat press or sublimation oven to transfer your designs. There are a few more supplies you'll want, which you can find in the list above. You can convert an inkjet printer for sublimation, but we recommend the Epson SureColor F170 for a starter printer. Check out the Epson F170 Sublimation Ultimate Starter Kit to get everything you need in one easy package!
Where do I start with sublimation?
You'll want to start by getting all of your materials. If you really want to test it out before investing in equipment, you can buy a sublimation transfer at an online shop and transfer it onto a sublimation blank at home with a heat press or sublimation oven. (Just make sure that once you use your oven for sublimation, you don't use it for food anymore.) Check out our list of 24+ sublimation projects for more inspiration.
What equipment do I need to start a sublimation business?
You'll need a solid sublimation printer, sublimation paper and ink, safety equipment, heat-resistant gloves and tape, and a sublimation oven or heat press. And, of course, you'll need sublimation blanks that you'll transfer your designs to.
What is the easiest program to use for sublimation?
Any design program works to create sublimation designs, so it's best to choose something that's easy for you! Many people like Canva because it's easy to use, but you're limited in what you can do. If you want to make more complicated effects, you'll want to look for a professional-grade desktop design program.
Can I Use Cricut Infusible Ink for sublimation?
Yes, you can use Cricut Infusible Ink sheets for sublimation, but they work in a different way from traditional sublimation prints. These sheets are pre-printed with patterns and gradients, and you'll cut them into shapes with your Cricut. Then you can use a heat press or oven to sublimate your items, such as the Cricut Mug Press. The only way to customize your designs with Infusible Ink is by buying the Infusible Ink markers and pens and drawing designs yourself.