Skip to content

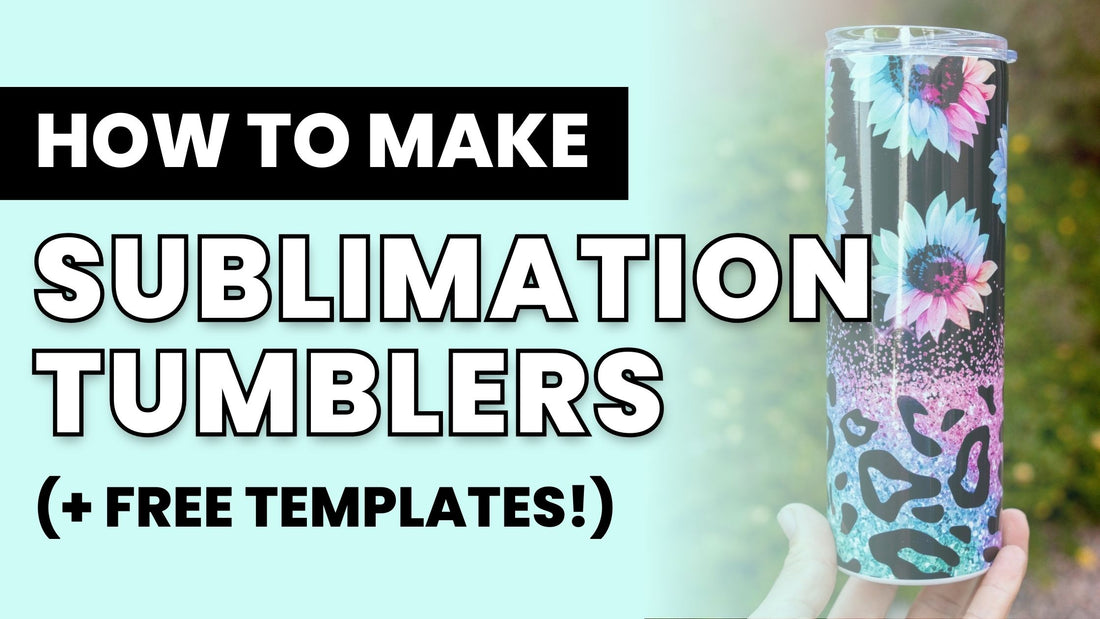
Wondering how to make colorful and unique sublimation tumblers like the ones you see online?
If so, awesome! You're in the right place ✨
In this guide, we'll explain how to make sublimation tumblers (it's easy!) even if you're a total beginner to sublimation.
We'll take you through the printing process, list up the necessary materials, and share our favorite sublimation tumbler blanks. Finally, you'll find a troubleshooting guide to solve any problems you might run into.
Watch Sam from MakerFlo sublimate a 40oz tumbler in this video 👇
How to Make Sublimation Tumblers
While it may seem complicated, making your own tumbler is surprisingly easy. Once you've got the equipment, it's just a matter of following a few simple steps and practicing until you get it right.
First up, here's what you'll need to make your first tumbler:
Step 1: Prepare Your Materials
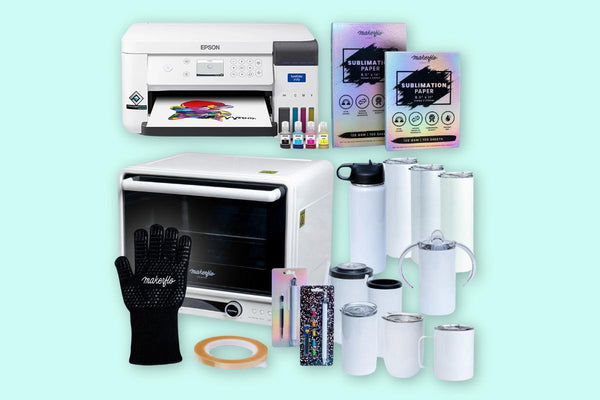
- A design file - We'll talk about how to get one of these (or make your own) in the next section.
- Sublimation tumbler blanks - A sublimation blank is an object that's designed for sublimation.
- A sublimation printer - The machine you'll use to print your designs. You can get a specialized sublimation printer for tumblers or convert your own.
- Sublimation ink - You'll load the printer with this specialized ink (also called sublimation dye) to print your transfers.
- Sublimation paper - Load this into your printer to make a transfer sheet.
- Heat-resistant tape - It's important to secure the transfer tightly onto your tumbler. You'll use heat-resistant tape for this.
- Heat-resistant gloves - For removing your hot tumbler from the oven or heat press.
- Well-ventilated room - This will keep the air clean as you sublimate your tumbler
- Sublimation oven or heat press - These are used to sublimate the tumbler. We recommend a sublimation oven for beginners, but a tumbler press also works well. (Make sure your sublimation oven is strictly used for sublimation, not food.)
Save Time With a Sublimation Starter Kit
We've done all the hard work for you and put together all the supplies you need in our Epson F170 Sublimation Ultimate Starter Kit, including a set of tumblers to practice on.
Or if you already have a sublimation printer and just need the oven, tumblers, and other supplies, the MakerFlo Sublimation Oven Kit is for you!
Got all that? Now it's time to prepare your tumbler design. (The fun part!)
Step 2: Prepare the Design
You've probably seen some really unique, colorful designs already. (If not, take a peek inside our Facebook Group—you'll find some great ideas in there!)
Now you're wondering, how can I make tumblers like these?
You've got two choices here.
- Find pre-made sublimation tumbler designs or templates on sites like Creative Fabrica. We've rounded up places to find more than 1000 free sublimation designs for commercial use.
- Make your own design! You can make a sublimation tumbler design with any sublimation-friendly software you like, from Adobe Illustrator to Canva or anything in between.
To fit your tumbler, you'll want to make a design that matches the dimensions of your cup (plus a few millimeters around each edge to avoid white edges). It should be wide enough to meet at the seam with a little overlap.
Scroll down to the "Recommended Sublimation Tumblers" section to see our recommended sublimation tumblers, plus free wrap templates for each size.
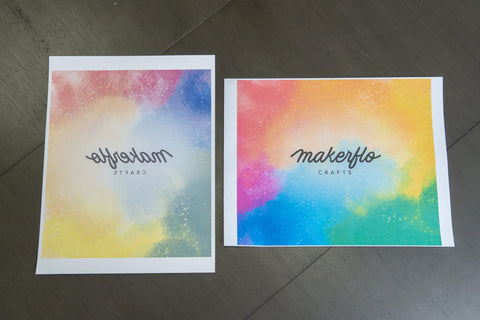
Now, let's talk about making seamless sublimation tumblers. This takes some trial and error, but it's definitely possible, even if you're a design novice.
How to make seamless designs
- Use a solid color. It's easiest to make seamless designs with a solid color because all you need to do is make sure the transfer paper overlaps a little at the edge. You could even make a gradient or striped design as long as both edges of your transfer use the same color.
- Experiment with patterns. You can try to make seamless designs with repeating patterns, like an argyle or plaid-inspired design. This will take some experimenting, but once you find the right size for your design, you can adjust it until the pattern matches up perfectly at the seam. You can make patterns using any vector design software like Adobe Illustrator, Affinity Designer, Canva, and more.
- Try the white seam option. You can make a design with two white (or same-colored) edges on either side. You can make it look like a ripped edge, create a gradient with your primary color, or use another effect to make it look natural. When your design meets at the seam, you won't have to worry about placing the design perfectly because both edges will match up.
Got your design just the way you like it? Great! Now it's time to print.
Step 3: Print Out the Design
This is the easy part! Make sure your sublimation ink and paper are loaded into your printer, use your printer's software to prepare for printing, and then print out the design.
Most sublimation printers should reverse the design for printing automatically. But if that doesn't work, you'll want to adjust your print settings so the design will print in reverse (like a mirror effect).
👉 Experiencing printing problems? Check out our sublimation printing troubleshooting guide to get the answers you seek!
You might notice that the colors in your transfer look faded. With sublimation, the ink activates when heat is applied, so the colors will become bright and vibrant during the transfer process.
(The image on the left is the sublimation transfer. The image on the right is a regular inkjet print for comparison.)
Speaking of which, let's talk about how to transfer your new sublimation transfer onto your tumbler.
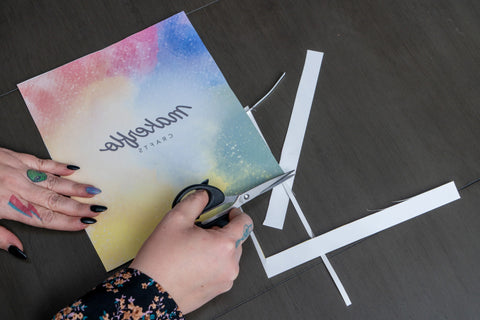
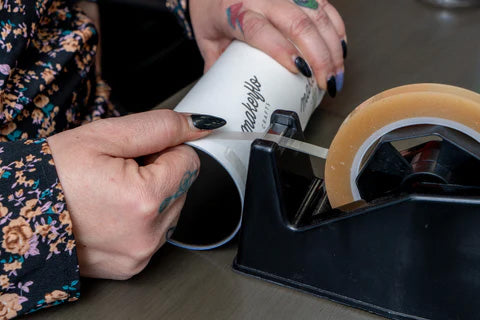
Step 4: Transfer the Design to Your Tumbler
First, prepare your transfer. Cut it down to size (while preserving a slight edge on all sides), and tape it onto the tumbler with heat tape. (Make sure the tape is only on the transfer, not the tumbler itself.)
If using a convection oven, you'll need to secure the design so it touches the tumbler on all sides without any gaps.
With a tumbler press, the press will clamp down on the design, removing most gaps. That said, you'll still want to tape down the design so it won't shift during transferring.
Option #1 - Convection oven method
Preheat your convection oven according to your tumbler instructions.
For Makerflo sublimation tumblers, we recommend baking at 375°F (190°C) for 5 to 6 minutes. If your tumbler is lying down flat, you’ll need to turn the tumbler halfway through baking. Luckily, the MakerFlo Sublimation Oven fits most of our tumbler blanks upright, so you don’t need to worry about this! (This is a general guideline—you'll figure out the perfect time and temp for your oven.)

Once done, remove it from the heat and remove the sublimation paper to reveal your design! Some people recommend letting the paper cool or dipping it in water if you're having trouble removing the paper.
Option #2 - Heat press method
Press your tumbler in the heat press for the time and with the temperature your tumbler maker suggests.
For MakerFlo tumblers, we recommend pressing your tumblers at a temperature of 360 to 365°F Fahrenheit (182 to 185°C) for 40 seconds. If you need to rotate the tumbler, press it again for the same time at the same temperature.
Remove the tumbler from the press and then peel off the transfer paper. Voila! Your very own personalized tumbler is ready!

👉 Running into problems? Check out our sublimation beginner's guide for the most common mistakes and how to fix them.
Step 5: Enjoy Your New Tumbler (& Take Good Care of It!)

(We love this wine tumbler design by MakerFlo Crafter Stacy!)
Your sublimation tumbler needs a little extra TLC to keep it looking fresh.
Each brand of sublimation tumbler will have its own instructions, so make sure to check yours for more information.
For reference, here are the care instructions for our sublimation tumblers and cups:
- Hand wash only
- Not dishwasher safe
- Not microwave safe
- Do not drop
Yes, they require some care, but having a tumbler that makes you happy is totally worth it.
Learn more in our guide to cleaning sublimated tumblers safely.
Recommended Sublimation Tumblers & Free Templates
Looking for a tumbler that's perfect for sublimation? We're so glad you asked!
MakerFlo makes more than a dozen sublimation tumblers and cups perfect for crafting.

Why choose our tumblers?
- They're coated for sublimation
- They're white and logo-free, ready for any design you throw at them
- They keep drinks cold for 24 hours and warm for 8 hours
- They're made with an absolute commitment to quality and durability
- They're BPA-free
- They come packaged in an Instagram-worthy holographic display box, perfect for a product-based business
(By the way, we've also got a ton more sublimation blanks, including mugs, pens, and other fun stuff, in our shop.)
Check out the lineup to get inspired for your own designs 👇
- 14oz Skinny Tumbler (👉 Download Template)
- 20oz Skinny Tumbler, Skinny Glow-in-the-Dark Tumblers, and Skinny Glitter Shimmer Tumbler ( 👉 Download Template)
Read More: How to Sublimate a 20oz Skinny Tumbler
- 40oz Tumbler (w/Straw & Removable Handle!) (👉 Download Template)
- 30oz Skinny Tumbler (👉 Download Template)
- 20oz Thick Tumbler ( 👉 Download Template)
- 30oz Thick Tumbler ( 👉 Download Template)
- 12oz Straight Wine Tumbler ( 👉 Download Template)
- FrostBuddy Universal Buddy 2.0 ( 👉 Download Template)
- FrostBuddy BIG BUDDY ( 👉 Download Template)
What is Sublimation Printing?
Sublimation printing (also known as dye-sublimation) is a method in which you print with sublimation inks onto sublimation paper to create a transfer.
Discover all the details in our ultimate guide to sublimation.
Bring Your Tumbler Ideas to Life with Sublimation Printing
Hopefully, this article has removed the mystery from the sublimation process and you're excited to get started!
The best way to get good at sublimating is to practice, practice, practice.
So gather your materials, choose a sublimation tumbler, and make your first one.
Pro Tip: Pick up the Epson F170 Sublimation Ultimate Starter Kit to get all the supplies you need in one place, plus a set of tumbler blanks to practice with. If you already have a printer, pick up the MakerFlo Sublimation Oven Kit instead.
We're cheering you on! Don't forget to join our Facebook Community to meet thousands of other crafters, find inspiration, and get your questions answered.
Or leave us a comment below with any unanswered questions about making sublimation tumblers, and we'll do our best to answer it for you 💬
Talk to you soon!
Frequently Asked Questions (FAQs)
What is needed to make sublimation tumblers?
You'll need a sublimation printer, sublimation paper, sublimation ink, a sublimation-friendly tumbler, heat-resistant tape, heat-resistant gloves, and a convection oven or heat press to transfer the design. Check out the equipment list in the article above for more details.
Can you make any tumbler a sublimation tumbler?
Not all tumblers work for sublimation. They need a special coating that works with sublimation inks. MakerFlo sublimation tumblers are made for sublimation and come in a variety of shapes and sizes.
Do you need a special printer for sublimation tumblers?
Yes, you'll need a sublimation printer. You can buy a specialized sublimation printer like the Epson F170 (our favorite beginner printer). If you don't want to invest in a true sublimation printer, you can convert a regular Epson inkjet printer into a sublimation printer.
Learn more about the kind of printers you need in our guide to sublimation printers.
What kind of oven do you need for sublimation tumblers?
Any convection oven will do. Just make sure that any oven you use for sublimation is ONLY used for sublimation! The transfer process creates toxic fumes as a byproduct, and you don't want that getting into your food.
At what temperature should I bake my MakerFlo sublimation tumbler, and for how long?
When using a convection oven, all of Makerflo's cups should sublimate well at 375°F for 6 minutes. (This is a starting point. Ultimately it depends on your oven and how hot it runs.) If you're using a heat press, we recommend pressing it at 360-365°F for 40 seconds. If the cup needs to be rotated in the heat press, repeat the steps. We have a time and temp guide with more info.
Where can I get wholesale sublimation tumblers?
MakerFlo sells affordable wholesale tumblers in a variety of sizes. Check out our full line-up in the article above!
Can you make sublimation tumblers with a Cricut?
You can use Cricut Design Space to create designs, but you'll need to use a sublimation printer (or a converted printer) to print out your design. Or you can use Cricut Infusible Ink transfer sheets to create a design, but these are pre-printed. Instead of printing a design, you'll cut out the Infusible Ink transfer sheet in the design you want. Finally, you can use a Cricut Mug Press to sublimate a tumbler if you modify it to fit the tumbler.