Skip to content

The future of decal stickers is here, and it's spelled UV DTF!
UV DTF printing is a method that prints UV ink onto film and instantly cures it to create a durable and easy-to-apply decal sticker. These decals stick onto any hard surface, like tumblers, glasses, pens, and more.
They're awesome because they're more durable, versatile, and long-lasting than traditional print-and-cut vinyl, waterslide decals, or sublimation prints. And in this post, we'll explain why that is!
What's Inside:
- What is UV DTF Printing?
- What Can You Make With UV DTF?
- The UV DTF Printing Process
- How to Get Started With UV DTF Printing for Less
- Frequently Asked Questions (FAQs)
Let's start with a more detailed definition.
What is UV DTF Printing?
UV DTF printing is a method of creating decal stickers. You use a UV or UV DTF printer to print a design onto transfer film, then laminate the transfer film to create a durable decal.
To apply, you peel off the backing of the sticker and apply it directly to any hard surface. (No need for a heat press!) You simply press it down, use a squeegee tool to adhere it firmly, then peel away the top layer to leave the decal permanently adhered to the surface.
UV DTF vs UV Printing vs DTF Printing
How do these methods compare? (Hint: they're all different!)
We just explained UV DTF printing, so here's how they differ from UV printing and DTF printing.
- UV printers make prints directly onto objects using UV ink (UV DTF prints onto film to make stickers)
- DTF printers make prints onto film, but they use DTF ink. These create DTF transfers that can be applied to t-shirts, garments, and fabrics. (UV DTF is made for hard surfaces and doesn't work on fabrics.)
What about printers?
You can't use a DTF printer to make UV DTF prints because the ink is different.
However, you can use a UV printer to make UV DTF prints if you print them onto UV DTF film. In that case, you need to use a UV ink that's proven to work with DTF. If you have a choice between rigid UV ink and flexible UV ink, make sure to use rigid ink for UV DTF printing.
Some manufacturers even offer UV DTF printers, which are designed specifically for printing on film.
Advantages of UV DTF Printing
You get some unique benefits with this printing method:
- You can print stickers easily without the messy powder adhesive used in DTF printing.
- You can keep the stickers for later or sell them as products.
- The stickers work on virtually any hard surface.
- It's easy to apply stickers. Remove the backing, press the sticker onto the item firmly, and peel away the clear top layer of film.
- UV DTF stickers are extremely durable. They don't scratch or fade easily.
- UV printing doesn't produce fumes like sublimation or DTF printing, and is more eco-friendly.
Downsides of UV DTF Printing
That said, there are some downsides:
- UV printers and UV DTF printers aren't cheap (though we'll show you an affordable way to get started at the end).
- You still need a laminating machine to create the stickers, though it's still easier than powder application or pre-treatment steps.
- These stickers only work on hard surfaces, so they won't work for garment customization.
What Can You Make With UV DTF?
Most hard surfaces can be customized with a UV DTF decal. This includes metal, glass, stainless steel, powder-coated steel, wood, and more. (That said, it's best to test your material of choice to make sure it sticks!)
That's why UV DTF is a great choice for customizing tumblers, glassware, kitchen items, home decor, pens, signage, and other hard surface items!
You can use UV DTF stickers on all of our sublimation blanks, stainless steel tumblers, and wood, glass, or powder-coated laser engraving blanks ! That's what we mean when we say this is a versatile decal 🎉
Wondering what it looks like in action? Take a look at some of these UV DTF projects from Ninja Transfers 👇

A UV DTF decal pressed onto a metal lunchbox. Source: Ninja Transfers

A UV DTF decal applied to a ceramic mug. Source: Ninja Transfers

UV DTF decals applied to wooden coasters. Source: Ninja Transfers
The UV DTF Printing Process: How to Make Stickers at Home
If you're interested in setting up a UV DTF station in your home or business, here's how to get started.
Step #1 - Prepare Your Materials
Here's what you'll need:
- A UV DTF printer or UV printer
- Rigid UV ink or UV ink that's proven to work on UV DTF film
- UV DTF film (Note: Some of these separate into A and B sheets, while others need separate laminating sheets.)
- A laminator (This machine will apply the adhesive layer to the sticker. Or you can buy a UV DTF printer with built-in laminator to skip this step.)
- RIP software (A professional printing software that prepares the artwork for printing. This should come with your printer.)
Step #2 - Prepare Artwork
Use your RIP software to prepare the artwork for printing. This helps with color management, or in other words, making sure the print comes out with the right ink colors. It also allows you to choose the print resolution and other settings.
You'll prepare the art so it prints in layers. First, a layer of white, if needed, then the colors, then a layer of clear varnish to seal in the print and make it durable.
Step #3 - Print
Once your artwork is ready to print, it's time to get the printer ready and place your UV DTF film for printing. Remove the protective layer from the film and place the right side up. (The side of the film that was originally covered by the protective film should be face-up.)
Make sure it's positioned as you like, and the printer is adjusted to the right height for printing. Then send the print job to the printer.
It'll print in white, then layers of color, then the clear varnish on top. As it goes, it'll use a UV-LED light to instantly cure each layer of UV ink. By the end, the sticker will be fully cured.
Step #4 - Laminate
If you have a printer that automatically laminates after printing (like the Aries 113 UV DTF Printer or DTFLINKO UDY-604P), you can skip this step! If not, keep reading to learn how to laminate and finish the decal.
After printing, you don't want to touch the print or let any dust collect on it, because next you'll apply the top layer with the laminator. This will turn it into a sticker that can be applied to hard surfaces.
Follow the instructions from your UV DTF film and laminator machine to press the top sheet onto the print. And voila, you've got a finished UV DTF sticker!
Step #5 - Apply the Sticker
When it's time to apply, you'll pull off the back protective layer of the sticker (the one behind the print), and you'll find that it's sticky and ready to press on any object.
Carefully place it onto your item of choice, and use a squeegee applicator to press it down with no gaps. Then, carefully peel off the top layer of film to leave only the decal attached to your item.
That's it! Now you have a beautiful piece of artwork on your object, and it will stay beautiful and vibrant for the long term.
Taking Care of UV DTF-Customized Items
UV DTF cups and other items can be washed in the dishwasher. But to keep them looking their best for longer, it's best to avoid heat or hot water when washing. Hand washing and air drying are best.
How to Get Started With UV DTF Printing for Less
In case you haven't looked into UV printers or UV DTF printers yet, it's good to know that these printers aren't cheap.
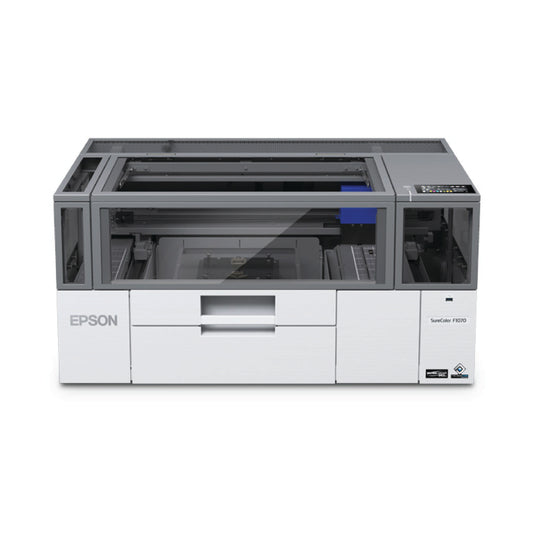
It's hard to find a good UV printer or UV DTF printer for less than $10K. (Except for our new favorite UV printer, the Epson SureColor V1070. It's a UV printer, but can be used for UV DTF as well.)

So, it's not going to be feasible for every crafter and business owner to set up a UV DTF printing station at home.
Instead, if you want to test out UV DTF at home and see if you like it before investing, we recommend trying out a UV DTF printing service (like Ninja Transfers) or buying pre-printed UV DTF transfers instead.
We may have something in the works for this, so sign up for our mailing list below to get notified of any new product drops around UV DTF at MakerFlo 😉✨
Frequently Asked Questions (FAQs)
Are UV DTF prints waterproof?
Yep, they can be washed both in the dishwasher or by hand! But avoid warm water and excessive heat if you want them to last longer.
How long do UV DTF prints last?
They're said to last at least 3-5 years (if not more) with good care.
What's the curing time for a UV DTF print?
The printer cures them instantly with a built-in UV-LED light. As soon as they come out of the printer, they're cured.
Can you use UV DTF for shirts?
No, UV DTF is for hard surfaces like tumblers, cups, and pens. You can customize shirts with regular DTF printing, DTG printing, or sublimation .
What's the difference between DTF and UV DTF?
They use different inks. DTF uses DTF inks, and DTF transfers are meant for fabric and clothing. UV DTF uses UV inks and is meant for hard surfaces.
What's the difference between UV printing and UV DTF?
UV direct printing is where you print directly onto an object, NOT a transfer sheet or decal. UV DTF printing is where you print onto a transfer film to create a sticker. Then, you apply the sticker to the object later. That said, you can use a UV printer to make UV DTF prints with the right settings and materials.