 Skip to content


What is sublimation printing, and how can you use it to create beautiful, custom-printed items like this? 👇

You’ll learn this and more in this in-depth guide to sublimation.
What's Inside:
- What is Sublimation?
- What is Sublimation Printing?
- Sublimation Printing Examples & Ideas
- What Do I Need For Sublimation Printing?
- Get Started Quickly With Sublimation Craft Kits
- The Sublimation Printing Process Explained
- Pros & Cons of Sublimation Printing
- Sublimation Printing Alternatives
- Starting a Sublimation Business
- Final Thoughts
- Frequently Asked Questions (FAQs)
First up, what is sublimation, and how does it work?
What is Sublimation?
In the crafting world, sublimation is a type of printing where you apply a printed transfer paper to an object and then apply high heat to create permanent designs.
With heat, the ink turns into microscopic particles that embed themselves into the object's surface.
This creates a seamless and beautifully vibrant design that doesn't peel or crack, because unlike decals, it's not stuck onto the surface. Instead, it's actually become one with the surface of your fabric or item.
What’s the science behind sublimation?
We all learned about the phases of matter in school, right? Matter can turn into a solid, liquid, and gas, in that order.
But during the process of sublimation, a solid turns right into a gas, skipping the liquid state entirely.
So what does this have to do with crafting?
Read on to learn about sublimation printing, which uses the science of sublimation to transfer your designs onto the surface of an object, like tumblers, pens, or t-shirts.
What is Sublimation Printing?

Sublimation printing, also known as dye-sublimation printing, is a type of printing that uses special sublimation dyes to create a transferrable design.
You print out the design with sublimation ink on sublimation paper, then press it onto an object with a heat press or sublimation oven.
The ink will sublimate and turn into a gas that seeps into and becomes part of the surface of your object, like a sublimation tumbler (pictured above), sublimation shirt, or other sublimation blank.
Unlike other printing methods that attach your design over the top of a surface, sublimation printing embeds your dyes on a deeper level, creating amazing, vibrant designs that won’t crack or peel off.
Get started now with our Epson F170 Sublimation Ultimate Kit which comes complete with everything you need!

Epson® F170 Sublimation Ultimate Kit
Get absolutely everything you need for sublimation, including our best-selling sublimation printer.
Or pick up our Sublimation Mini Starter Kit to try this crafting method for under $100.

Sublimation Mini Starter Kit
Try out sublimation with a starter kit of mini blanks and pre-printed sublimation transfers.
Which Materials Work With Sublimation?
You can use sublimation printing for three kinds of items:
- Polyester fabrics
- Items with a sublimation-friendly coating
- Acrylic items

Pictured above is our sublimation kitchen towel, which is made especially for sublimation printing.

Sublimation Kitchen Towel
Customize this waffle-weave tea towel with your own sublimation designs!
What about other materials? We've also written about sublimating on acrylic, cotton, and wood if you're curious!
Sublimation Printing Examples & Ideas
#1 - Sublimation Tumblers
You can use sublimation to create beautiful custom tumblers with any design you can imagine.

40oz Sublimation Tumbler
Our best-selling 40oz sublimation tumbler with optional handle for easy crafting.
Learn how to make sublimation tumblers, discover the right sublimation tumbler times and temperatures, and find out how to start a tumbler business here.
#2 - Sublimation Mugs

You can customize mugs, cups, and even sippy cups with your own designs. Find more sublimation cup ideas here!

12oz Camper Mug
Make your own sublimation mugs with this 12oz camper mug.
#3 - Sublimation Pens & Pencils

Create custom pens and pencils with sublimation pen and sublimation pencil blanks.

The Crafters Gel Pen
Customize these easy-to-use gel pens with your own sublimation designs.
#4 - Sublimation Shirts

Many crafters press sublimation designs onto polyester t-shirts to make sublimation shirts.
#4 - Sublimation Coasters

If you use a sublimation-friendly coaster like our leatherette sublimation coaster, you can create custom home decor just by pressing your designs onto it!

Square Coaster
These coasters are easy to sublimate with any size heat press.
#5 - Sublimation-Friendly Laser Plywood

Check out Truflat plywood, which is a premium pre-finished laser plywood that's made for sublimation, laser cutting, and laser engraving. You can sublimate a design onto the front then use a laser-cutter to cut it into shapes.

Wood for Laser Cutting by TruFlat 1/8"
This laser plywood is ultra-flat and works with sublimation. Choose white for a dry-erase finish!
The white finish also has dry-erase capabilities, so you can make a dry-erase board with a sublimation design like this one!
💡 Find more ideas: Check out more ideas with our full list sublimation ideas, sublimation cup ideas, and best-selling sublimation products.
What Do I Need For Sublimation Printing?
Here's what you need to get started with sublimation printing!
#1 - Sublimation Printer

You'll need specialized printer to print your design using sublimation ink, such as the Epson SureColor F170. This is the printer we recommend most!

Epson® SureColor F170 Sublimation Printer
This sublimation is easy to use and produces beautiful and vibrant sublimation prints.
Check out our Epson F170 review here where we show you how to unbox and set up the printer and complete some text projects to show you how it works.
Find out why think the Epson F170 is the best Epson printer for sublimation in this article or find more picks in our list of best sublimation printers for beginners.
#2 - Sublimation Paper & Ink

Next, you'll need the supplies for printing your own designs!
You'll get the best results if you use the sublimation ink that comes with your printer. If you buy your Epson F170 sublimation printer from us, it comes with ink and a starter kit of our best-selling MakerFlo sublimation paper.

MakerFlo Sublimation Paper
We designed our own brand of sublimation paper with crafters in mind!
If you're curious about other brands, we've written some guides comparing the best sublimation ink and best sublimation paper you can buy online.
#3 - Sublimation Blanks

What will you press your sublimation transfers onto? It's best to choose things that are pre-made for sublimation printing, which are called sublimation blanks.
We have a huge selection of sublimation blanks, like tumblers, pens, keychains, wind spinners, and more.
Try our Sublimation Mini Starter Kit to get a sample of blanks that you can try out with a mini press and pre-printed sublimation transfers, even before you buy a sublimation printer!
Sublimation Mini Starter Kit
Try out sublimation with a starter kit of mini blanks and pre-printed sublimation transfers.
#4 - Sublimation Oven or Heat Press

You'll need something to apply high heat to your sublimation transfer in order to "print" the ink onto your object!
Whether you choose a sublimation oven or heat press is up to you.
A sublimation oven is best for hard objects like tumblers, where the transfer paper is tightly taped onto the surface. You can actually fit a bunch of tumblers in an oven and sublimate them at once, instead of pressing them one by one.

MakerFlo Sublimation Oven, 40L
This sublimation oven can sublimate multiple tumblers at once.
⚠️ Caution: Make sure you only use your sublimation oven for sublimation crafting, never for food.
A heat press is best for pressing fabrics and soft or flat items. It's easy to place the design where you want it, then press down and transfer the design!

Mini Heat Press - 7" x 5" Heating Plate
Take this handy heat press with you wherever you go!
Find our recommendations for the best sublimation heat press machines here.
#5 - Sublimation Designs
Any image or even a photograph can work as a sublimation design, as long as you print it with sublimation ink onto sublimation paper.
You can find tons of great sublimation designs at Creative Fabrica or make your own using sublimation software!
Watch how to create a custom sublimation design with Canva in this video 👇
Where to Find Awesome Sublimation Designs
Find thousands of free sublimation designs for commercial use, or browse lists of design ideas by topic:
- Christmas
- Hanukkah
- Halloween
- Easter
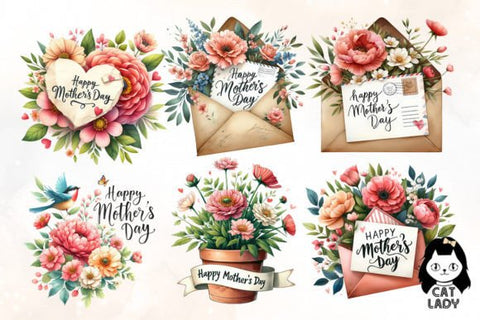
- Mother’s Day
- Father’s Day
- Autumn
- American Flags
- Valentine's Day
- Breast Cancer Awareness
- Baseball
- Dogs
More Supplies to Prepare
Scissors or Paper Cutter - To trim your printed design to the size of the object.
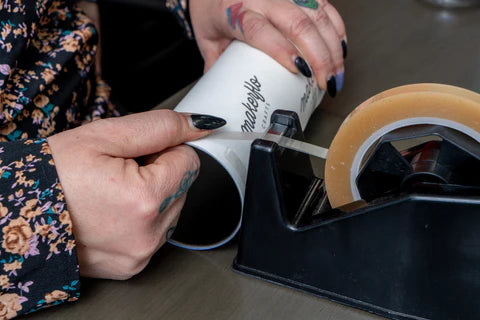
Heat-Resistant or Transfer Tape - Use this to attach the design to the object before transferring it. Check out our heat-resistant tape (and extra-wide version) here.

Skinny Sublimation Heat Tape (0.375" x 216' FT)
Our tape is clear and leaves no stains or marks behind.
Heat-Resistant Gloves or Potholders - Heat-resistant gloves are helpful to handle hot items after sublimating the design.

MakerFlo Heat Resistant Glove - Ambidextrous
Protect your hands with our custom-made ambidextrous heat gloves.
Plastic Gloves (optional) - To tape down the design without any fingerprints or oils getting in the way.
Get Started Quickly With Sublimation Craft Kits
Want to start sublimation printing but not sure what to get first? These starter kits can help!
Epson F170 Sublimation Ultimate Kit
Get our #1 recommended sublimation printer for beginners, plus starter designs, a ton of blanks, all the supplies you need and a sublimation oven, too!
Epson® F170 Sublimation Ultimate Kit
Get everything you need for sublimation printing in this amazing starter kit!
See more sublimation starter kits here!
Once your materials are ready, it’s time to start printing.
Here’s how to do it step by step.
The Sublimation Printing Process Explained
Step #1 - Print the Design

First, create a design using your design software of choice, and print it out with a sublimation printer.
(Most sublimation printers will automatically mirror your image, but make sure the image is in reverse so it’ll transfer correctly.)
Step #2 - Prepare the Print for Sublimation

First, cut your image down to the exact size you need for the item.
Then it’s time to attach it to the item to transfer it with heat. Using heat-resistant tape, you’ll tape your design down where you want it to appear on the object.
If you’re using a sublimation oven, you’ll need to tape the design tightly to make sure there are no gaps between the sublimation paper and the object. You can also use shrink wrap to seal designs on items that need seamless coverage, like a cup or tumbler.
If using a heat press, you can use less tape because the press will make sure the design is held down tightly.
Step #3 - Apply Heat and Sublimate!

Finally, you’ll bake the item inside the oven or use the heat press to sublimate the design and transfer it to your object of choice.
Learn more about sublimation tumbler time and temperatures here.

Watch Us Sublimate a Wind Spinner!
Watch as Sam sublimates our sublimation wind spinner using our mini heat press in this video 👇
More Sublimation How-Tos to Check Out
Check out these guides to get more detailed instructions for your sublimation projects.
- How to Make Sublimation Tumblers (+ Free Templates)
-
Sublimation for Beginners: How to Avoid Mistakes and Create Beautiful Designs
- Sublimation on Acrylic: How to Get the Best Results!
- Can You Do Sublimation on Wood? (Yes, and Here’s How)
-
17+ Common Sublimation Printing Problems & How to Fix Them
Feeling Stuck? Get Help From Our Facebook Community
If you need help, check out our Official MakerFlo Facebook Community to get help from our team and thousands of other sublimation crafters!
Pros and Cons of Sublimation Printing
Here’s what’s great about sublimation printing:
- High-Fidelity Designs: Designs transfer beautifully, and colors are vibrant and clear. You can make some really beautiful fades, such as a watercolor effect, that aren’t possible with other types of printing
- Affordable: It’s affordable to get started—you can get started for less than $1,000 (a steal compared to other methods)
- Can Print in Advance: You can print transfers in advance, then save them for later or sell them as a standalone product
- Easy: It’s easy to get started—just print, tape, and transfer!
- No Cracking or Peeling: The ink gets embedded deep into the material, so it doesn’t crack or peel off with time, and the color stays clear and bright for the long term
- No Texture: Unlike other transfer methods that apply film or paint to the top of a surface, this ink goes into the material for a perfectly smooth finish
And here are the downsides to be aware of:
- Learning Curve: There is a learning curve. You’ll need to discover the right heat, pressure, and taping method for the best results.
- No White Ink: You can’t print white with sublimation ink. If you want white elements in your designs, you’ll need to transfer them onto a white surface.
Sublimation Printing Alternatives
How does sublimation printing compare to other print methods?
Sublimation vs Heat Transfer Paper
Heat transfer paper can be applied to fabrics and other surfaces with heat just like sublimation designs, but the process is different.
Heat transfer paper is easier to print because you can use a regular inkjet printer to print it out. And you can use heat transfer paper on various fabrics and surfaces, not just polyester.
But, the design gets adhered to the item as a layer resting on the surface, which makes it more susceptible to wear and tear. It doesn't sink into the surface for a professional finish like sublimation.
Sublimation vs Vinyl
You can apply heat transfer vinyl to a variety of surfaces to customize them.
Instead of a printer, you need a cutting machine like a Cricut to cut your vinyl into shapes.
Vinyl is difficult in its own way, becuase you need to "weed" the design, in other words, pull out the tiny pieces of vinyl that you've cut to create a clean edge. You also need to place each layer of color carefully to line up the design. It doesn't sink into the surface, but lays on top. And you can only do blocks of color unless you use a printable vinyl.
Vinyl is a great crafting method on its own, but you won't get the same effect as sublimation.
Learn more in our comparison of sublimation vs vinyl.
Sublimation vs Waterslide Decals
Waterslide decals are the OG customization method. You print a design with any regular inkjet printer on waterslide decal paper, cut around the decal, soak in water, then apply to your item!
Waterslide decals stick onto the surface of your object, which means they're not as durable as sublimation. You also need to get the technique right to avoid any placement mistakes or warping. Also, waterslide decals are best on hard items like tumblers, but don't work well on fabric.
Sublimation vs Screen Printing
With screen printing, ink is applied to fabric using stencils and a special squeegee.
Screen printing words on cotton, while sublimation doesn't. You can also add glitter and other textured effects with screen printing that you can't do with sublimation. Screen printing is faster and cheaper for high-production print shops that print the same design over and over again.
But, screen printing has a greater up-front cost because you have to create stencils for each color in your design. And while you can create complex blended colors, you usually must stick to a few colors.
Sublimation vs DTG Printing
With DTG printing (also called direct-to-garment printing), the printer prints your design right on top of the fabric, meaning you don’t need any transfer paper.
DTG can print on any color shirt, including black and dark colors, and many materials including cotton, which you can't do with sublimation.
However, you can’t use DTG printing on plastic items like tumblers, pens, and mugs. It’s only used for fabric. And since it’s printed on top of the fabric, it doesn’t have the soft feel you get with sublimation.
Sublimation vs DTF Printing
With DTF printing (also known as direct-to-film printing), you print your design onto a film, then transfer the design onto fabric.
DTF printing works on any fabric, making it a versatile printing method. But it doesn't work for hard objects. For things like tumblers or pens, you need to use UV DTF printing.
And after transferring your design, you’re left with a silky, plasticky feel of the film that’s been adhered to the fabric (or the UV DTF decal on a hard surface), unlike sublimation designs that have no texture at all.
Sublimation vs UV Printing
UV printing is a cool printing method that prints UV ink onto objects directly and cures them right away.
UV printing doesn't require any heat press, which makes it easy to print. The UV prints are long-lasting and resistant to damage.
But UV printing makes a texture on the surface, unlike sublimation which doesn't leave any texture. It's difficult to make soft blends like sublimation can do, and UV printing is designed for hard items, not fabric.
Starting a Sublimation Business

Interested in making money from your sublimation crafts? Here are some articles that can help you with that:
- How to Start a Craft Business That Makes You Money This Year
- How to Sell at Craft Shows: 7 Tips to Make More Money
- 500+ Craft Business Name Ideas For Your New Business
-
25 Best-Selling Sublimation Products to Try This Year
Final Thoughts
Are you ready to start crafting with sublimation?
Browse our huge lineup of sublimation products to get you started.
And if you're ready to get started now, check out our Epson F170 Sublimation Ultimate Kit with everything you need! Alternatively, you can snag our Sublimation Mini Starter Kit to try it out for under $100!
Epson® F170 Sublimation Ultimate Kit
Get absolutely everything you need for sublimation, including our best-selling sublimation printer.
Also, join us in our Official MakerFlo Facebook Community, where you can meet thousands of other crafters and get inspired by what they're creating! We'll see you inside.
Happy crafting!
Frequently Asked Questions (FAQs)
Can you sublimate ink onto anything?
Sublimation works on fabrics that are at least 65% polyester, polyester-coated materials, or items that have been sprayed with a sublimation coating.
It doesn’t work on black or very dark materials because you can’t print with white ink. The dyes only dye it darker than it originally was. That's why most sublimation shirts and materials come in white.
What is sublimation shirt printing?
Sublimation shirt printing is a method in which you print a design with special dyes then transfer it to a shirt using the process of sublimation.
Sublimation dyes turn into a gas that sinks into the t-shirt fabric and dyes it from within, creating a vibrant and beautifully blended design that never cracks or peels.
Can you use white ink in a sublimation print?
No, you can only print with CMYK colors, so using a white or light-colored background for sublimation crafts is best.
Does Cricut use sublimation?
You can create sublimation designs with a Cricut using Cricut Infusible Ink sheets. The downside is that they come pre-printed with sublimation dyes, so you can’t print your own designs (you’ll just cut them into the shapes you want).
However, they do provide special Infusible Ink pens that you can use to hand-draw custom designs.
To print your own designs, you’ll need a sublimation printer.
Can you do sublimation without a printer?
If you want to do sublimation, you'll need to buy pre-printed sublimation prints or pay someone to print them for you. But printers aren't that expensive compared to other crafting methods, so we recommend buying a printer for yourself.
What is the cheapest way to do sublimation?
You can buy a brand-new inkjet printer and fill it with sublimation ink if you want to save money. But the printer will be more likely to get clogged and break. For best results and to make your investment last longer, we recommend investing in a true sublimation printer like the Epson F170 which will give you the best results overall.


